Pages

Showing posts with label recipe. Show all posts

Thursday, February 6, 2014

brown butter snickerdoodles.

i am not willing to tell you all how many times i made these snickerdoodles in the last two weeks because the answer is embarrassing.  but you know what? they're amazing. every time i make them i wonder how on earth no one has proposed to me yet. except for i just remembered that the first time i made these, my friend dylan actually did propose. but he also proposed to my friend kelli in a very public setting and then proceeded to open a wedding registry with her at macy's all on a date dare. so like....yeah.
i digress.

 photo edit1title_zps0dc3034f.jpg
adapted from this recipe

ingredients
2 1/2 cups flour
1 tsp. baking soda
2 tsp. cream of tartar (or baking powder)
1/2 tsp. cinnamon
1/2 tsp sea salt
1 cup margarine or butter
1 1/4 cup brown sugar
1/2 cup sugar
1 egg
1 egg yolk
1 Tbs. vanilla
for rolling the cookies:
1/2 cup sugar
2 tsp. cinnamon

1. mix together dry ingredients: flour, baking soda, cream of tartar, cinnamon, sea salt. set aside.
side note: sea salt makes all the difference. really. 10x better than normal salt, you peasants.

2. brown the butter! guys, i had never done this before, and it legit doesn't seem to me like "browning the butter" should do anything significant, but like.....whoa. WHOA. why did i not know that this was a Thing?! Thing with a capital T?! watch out world, because i might just start browning the butter in every recipe i ever make.

anyways. slice the butter and let it simmer until it is nice and brown and nutty. but not longer, cause burned butter is gross.
 photo DSCN2081edit_zps5862b0eb.jpg

3. once the butter is browned, beat it together with the sugars, eggs, and vanilla. it should end up this nice caramel-y color: 
 photo DSCN2086edit_zps91f80b4d.jpg

4. then beat the dry ingredients gradually into the wet mixture until it is beautiful and wonderful and perfect. warning: this might be the best snickerdoodle dough that has ever existed:
 photo DSCN2088edit_zps30af6918.jpg

5. IMPORTANT: wrap the dough in waxed paper and refrigerate it for an hour. i once read a really long article about the chemistry that goes into refrigerating cookie dough. and yes, i know exactly how nerdy that sounded. but the point is, you should really refrigerate your cookie dough.

6. after your dough is refrigerated, roll it into 1 or 2 inch balls and roll in the cinnamon sugar mixture before placing on a greased pan.
 photo DSCN2089edit_zpsab016df7.jpg

7. cook for about 7 minutes at 350°. take them out of the oven when they just barely start to look brown and they are still nice and puffy on top. then let them sit on the pan for a couple minutes before removing them to a cooling rack.
 photo DSCN2094edit_zps0c405b33.jpg
  photo edit2_zps9dc4f82b.jpg
GUYS, THEY ARE SO DELICIOUS. 
i am willingly admitting that these cookies are my current significant other.

make. eat. love.

Monday, December 9, 2013

oreo truffles.

it's been forevs since i've posted a recipe tutorial. like, i forgot that i know how to cook? this semester my schedule has been pretty crazy, and i'm never home early enough to cook a good meal. combine that with not having a regular grocery shopping schedule and also not having anyone to cook for (ahem, being single...), and my motivation to cook is pretty low. for just myself, i'm pretty dang content with a sandwich or pasta. which is boring, i know. 

but i went to a murder mystery party on saturday, and i was instructed to make a "classy dessert", so obviously i had to come up with something. cue....oreo truffles.

 photo DSCN2015edit2_zps90db312f.jpg

ingredients
1 package regular oreos
1 (8 oz.) package cream cheese, softened
1 (12 oz.) package semi-sweet chocolate chips

this is the easiest recipe ever. but i took crappy pictures, so brace yourself.

1. mash 7 oreos as tiny as you can and set aside for later. you can use a food processor if you have one, but i'm a college student, which means i stuck those babies in a ziploc and rolled them out like crazy with my own measly muscles. and a peanut butter jar. cause if you recall from all my recipe posts last winter, i do not own a rolling pin. #collegestudentprobz 

2. mash the rest of the oreos. see step 1. 

3. mix the cream cheese with the second batch of mashed oreos until it resembles something like this: 
 photo DSCN2009_zpse93b07df.jpg

4. roll the oreo/cream cheese mixture into little balls and place on wax paper. honestly, the size doesn't matter. mine were about 3/4 inches wide. melt your chocolate chips while you're doing this. (microwave on 50% power for 3 sets of 30 seconds, stirring in between.)

5. dip oreo balls into chocolate and lay out on wax paper. there has to be a more graceful way to do this, but i was in a time crunch and i honestly just used my fingers. it was effective, if not the most beautiful process. 
 photo DSCN2011_zps79ec9e81.jpg

6. sprinkle the mashed oreos that you set aside at the beginning over the melted chocolate, and then stick the pans in the freezer for about 15-20 minutes. when you take them out....BAM! ready to serve. classy.

 photo DSCN2016edit_zpsd29dbc99.jpg

easy peasy, lemon squeezy! 

on the menu for this weekend's christmas dinner party:
homemade bread bowls
cream of broccoli soup
tomato basil soup
some kind of hors d'oeuvres
some kind of cheesecake

help me out with some suggestions on those last two, guys! does anyone have any great recipes for me?

link up with totally posted and kara

Wednesday, May 29, 2013

oreo cool whip cake.


once upon a time i found a really great recipe on pinterest for oreo cool whip cake. except when i followed the link for directions, i discovered that there were very few directions, and what was written was in spanish. 
so, taking the above pictures as my guide, i made my own oreo cool whip cake instead!
and YOU GUYS. it was fantastic.

(EDIT: i found the original website that this picture came from! go here and give them credit, because they did a way better job than i did.)

oreo cool whip cake

ingredients:

two packages oreos (i used one double stuff and one chocolate cream)
one tub of cool whip (the bigger size. i think what is pictured is too much. only use one.)
about 1 1/2 cups of milk
chocolate and caramel syrups

 photo F55499E5-321A-4926-8FED-C3B8C4774D43-17134-00000D5CD8C34C72_zps2690fb2c.jpg

1. dip each oreo in the milk and hold it under for about 10 seconds. it might feel like too long, but trust me on this one. layer the dipped cookies on the bottom of your glass 9x13 pan.

 photo C628066B-1E81-442F-B140-ECD434CC1426-17134-00000D5D2B5BC73D_zps90391871.jpg
{i did the chocolate cookies first}

 photo C2BEA587-89EA-48FB-9C6B-BD2A168864B3-17134-00000D5D366A2D7B_zps3687ebb3.jpg
{one layer done}

2. spread a layer of cool whip over the cookie layer. i think it serves easier if this layer is thinner than the top layer, so use less than half of the tub. maybe like a 1/3 of it?

 photo 0725E3C2-B233-4267-B47F-95553E0383E3-17134-00000D5D401D789A_zps1f2af1b0.jpg
{before i was done. i used more cool whip than this.}

3. drizzle the top of that layer with caramel and chocolate syrup.

 photo E6828A4E-BD02-4402-9062-21B31D6D1EC2-17134-00000D5D4F3AFDCF_zps301e7b9b.jpg

 photo 924A6C29-52E5-49B7-9929-E913277F7FAC-17134-00000D5D5D4F0C17_zps1951bb33.jpg

4. do step one again with your other package of cookies. i filled up the edges by breaking a couple cookies in half.

 photo F24C3343-540F-4ADE-B9D4-E47EFF97DDCF-17134-00000D5D6CC531A6_zpsbbd1d4b9.jpg
{had to use my iphone for this cause my camera was dead. hence, the poor quality pictures.}

5. layer the rest of your cool whip on top.

 photo 806768B3-5E4D-4431-9ACB-D3F1DF610534-17134-00000D5D8B94CDF3_zpsad1ab42c-1_zps89136506.jpg

6. mash up whatever oreos you have leftover (i only had like 3 of each kind. but maybe i ate some along the way so...) and sprinkles over top of the cake. then drizzle with more chocolate and caramel syrup. yummmmmm.
then i would stick it in the freezer for a bit before serving, just so the cool whip isn't too melty. 

 photo 85CBC459-3B26-4700-B563-936C443E7EB3-17134-00000D5D98959388_zps9d9be19f.jpg

 photo D63CFB89-EFBA-4B41-9113-F2548ABCBD9B-17134-00000D5DA83CE2C4_zps753eda60.jpg

 photo E97F20CC-A6C1-4349-BD3C-51C51F4B6850-17134-00000D5DD574CA44_zps321e35c0.jpg
{i served mine at a picnic and it got a bit melty on the walk over. but still devilishly delicious!}

this cake is super easy, super yummy, and nice and cool for a summer bbq or picnic.
enjoy!

Wednesday, May 8, 2013

chicken alfredo pizza with pizza hut style crust.

welp.
i made some really fattening and delicious food again. this time it was inspired by a dream. 
it's normal to dream about pizza, right? 
good. 
anyways, i was inspired in a dream to make chicken alfredo pizza with homemade pizza hut style crust, and since i had all the right ingredients, i decided tuesday, may 7th was the day to do it.

chicken alfredo pizza with pizza hut style crust

 photo 16B882F2-46FF-44BF-A8AB-5FB6B8AD7489-24645-00001469FEBD6B23_zpsb6fb8069.jpg

ingredients:

crust:
1 Tbs sugar
1 package dry yeast
1/4 cup dry milk
1 tsp. garlic salt
1 tsp dried oregano
1 1/3 cup warm water
3 1/2-4 cups flour
2 tablespoons vegetable oil (for dough)
more vegetable oil (a little in the bottom of each pan)

sauce: 
3 Tbs butter
1 cup milk (whole is best, but whatever will work)
1/4 cup flour
1/3 cup fresh grated parmesan (the powder kind works if that's all you have)
1 tsp greek seasoning
2 tsp italian seasoning
1 tsp garlic powder
salt&pepper to taste (i put a lot)

toppings: 
grated mozzarella cheese
grates parmesan cheese (not the powder kind)
1 chicken breast cooked and sliced
1 tomato diced small and cooked for about 7 minutes at 350°
(that's all i used, but you could add cooked spinach, broccoli, mushrooms, artichoke hearts, or pretty much anything else and it would be extra delicious)

i didn't take great pictures for this because i kind of made it in a hurry to get the dough rising, but hopefully my directions will be good enough for that part at least.

first you're going to make your crust dough: 
put yeast, sugar, salt, and dry milk in a large bowl. add water and stir to mix well. allow to sit for two minutes. add oil and stir again. add flour and stir until dough forms and flour is absorbed. you'll probably have to use your hands for this. knead for about 10 minutes. if the dough is too dry, add a little bit of water, and if it's too wet, add a little bit of flour. you know the law drill. (mulan, anyone?)

put the dough in a nice, warm place. i'm the most impatient person when it comes to letting dough rise, so i usually just turn my oven on to the lowest temp (170°) and put the bowl of dough in there for about 40 minutes instead of letting it sit out for 90. this makes the edges a little crispy, but it still works for me. 

while this is happening, you can prepare your 4 pans. i used 9" round cake pans, but you could use 2 9"x13" cake pans or 2 larger round pans if you wanted to.  
prepare the pans by putting a drop of vegetable oil in the bottom of each and spreading it all over the bottom and sides with a paper towel. this is where you would sprinkle the pans with cornmeal if you had it, but since i didn't, i sprinkled them with garlic salt and oregano instead. 

after it's risen, split your dough into 4 even balls, and place each ball in a pan. then flatten them out all along the bottom and up the sides. i just did this with my hands. actually, i had canadian roomate do it, and she did great. once all the dough is flattened, let it rise a little bit more in the pans while you finish your sauce and toppings.

 photo A883EA31-C389-40FF-85D1-4EA4699008DF-24645-00001469BBC9844B_zpsb0e19ead.jpg

chicken: 
i've taught you how to do this a hundred times, so go here for the old directions. all i changed this time was that i also covered each half of the chicken breast in pesto sauce as well, and since i only cooked one breast, it took about half the time.

{this is a picture from another recipe. i only used one breast cut in half.}

sauce: 
melt 3 tablespoons of butter in a small sauce pan. add about a quarter of the milk and then the flour. whisk it like crazy before it gets clumpy. then add the rest of the milk and the parmesan. then season the crap out of that sauce. y'all know i don't actually use measurements, but what i listed above should be close enough. whisk it all together and then let it come to a boil for a couple minutes to thicken. if it gets too thick, add a little bit of milk until it's the right consistency.

 photo 663BA59D-D060-4277-A525-AFA433242F41-24645-00001469C603E157_zpsf16f32c8.jpg

and now for the assemblage:
put a big scoop of sauce on each crust, and spread it out leaving a little lip of dough for the crust. then sprinkle a tiny bit of mozzarella cheese over top. then lay out slices of chicken over the whole thing, and sprinkle with your cooked tomatoes. then load a bunch more mozzarella cheese on top, and a handful of freshly grated parmesan over that. 

 photo 40A3B39B-D5A8-4685-87B4-9CB89BB22466-24645-00001469E632EB41_zps196a8380.jpg
{in the process}

put two pizzas in the oven at a time, and cook for about 15 minutes at 350°, or until the edges of the crust are brown and the center is fully cooked. 

 photo 16B882F2-46FF-44BF-A8AB-5FB6B8AD7489-24645-00001469FEBD6B23_zpsb6fb8069.jpg

 photo 1468E23D-469D-4C4B-9258-1D190EC38A8B-24645-0000146A07D17C41_zpsfe1d1a81.jpg

the crust will be nice and thick and fluffy, just how we like it.

bon appétit!

and p.s. don't forget about throwback thursday tomorrow! link-up starts at midnight!

Tuesday, January 8, 2013

baked alaska.

Photobucket

once upon a time i had the ingenious idea to try my hand at baked alaska. and not just baked alaska, but individual-sized baked alaska with sparklers in them for our fancy dinner party. 
it went swimmingly. 

Photobucket

Photobucket

Photobucket

Photobucket

Photobucket

Photobucket

Photobucket

angel food cake, chocolate ice cream, freeze it, cover in meringue, freeze again, bake for 2 minutes to brown the meringue, add some raspberry syrup, stick a sparkler in it, snap some pictures quickly before it melts too much, and VOILA! 
individual baked alaskas. 

(not my favorite tasting dessert, but only because i don't like meringue. otherwise it was great!)

my legit reaction to putting the sparkler in the cake:
DSCN0739_zps6977e4a9
why do i do this to myself?


Wednesday, December 19, 2012

white chocolate peppermint pretzels.

so here's the thing, you guys. i kind of made christmas my hobby this year.
i'm not really sure what i'm going to do with myself once it's over. 
from decorating our apartment, crafting, making christmas cards, helping with the food for the dance faculty christmas party, and making christmas treats for friends and (fhe) family, the season has definitely kept me busy! 
now that i'm home i'm going to relax a little, do some baking, and read a couple of books in my spare time. 
here is the last christmas project i will share with you guys, and then i promise i'll move on to other things. :)

white chocolate and peppermint dipped pretzels

DSCN0471_zpsab2aa74d

ingredients:
pretzels of any shape or size
white chocolate almond bark
a few candy canes
wax paper

Photobucket

DSCN0469_zpsceded03e

1. break several candy canes in pieces, place them in a ziploc, and then smash them up until you have pretty tiny pieces. i broke them with the bottom end of a ragu pasta sauce jar. i find myself doing this a lot, so maybe i should invest in a rolling pin? also, this step may or may not wake up your napping roommates. 

Photobucket

2. this is the only tricky part, because heating almond bark is a delicate matter. i took 4 squares at a time in a small glass mixing bowl and heated them for 60 seconds on high. then i stirred a tiny bit and microwaved in 15 second intervals, stirring in between each, until the bark was all melted. do not overheat. or it will be destroyed. :(
i used the entire package of almond bark, but only heated it 4 squares at a time.

Photobucket
julie likes to watch me during my projects. and sometimes when i am doing my hair, which gets a little bit weird.

3. i decided not to deal with dipping the entire pretzel in the almond bark and just did half of it instead. that way i didn't have to deal with lifting the pretzel with a fork and all that. plus i kind of think they look cute with  only half dipped. and obviously food is better when it is cute. 
dip half the pretzel in almond bark, and then dip the front in the mashed peppermint pieces. lay on wax paper to dry. also, i did half the pretzels with peppermint, and half with just almond bark.

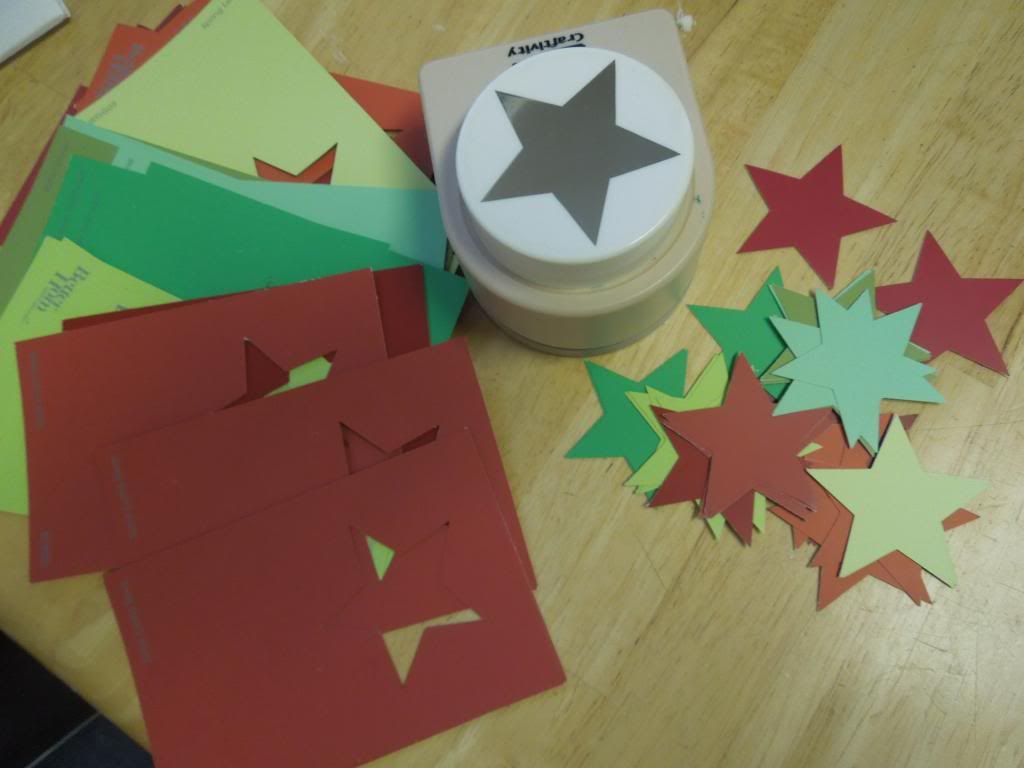
4. we gave these away as treats to our fhe family members, some good friends, and our neighbors, because i obviously think starting projects like this are way more exciting than studying for finals. we used some clear bags, stars cut out of red and green paint samples, and string to package them and deliver. the envelopes have christmas cards from our fhe family or our apartment in them, which i shared in this post.  

Photobucket

Photobucket

Photobucket

merry christmas from apartment 17!
if i could share these treats with all of you readers, i would!
Related Posts Plugin for WordPress, Blogger...